The rich text element allows you to create and format headings, paragraphs, blockquotes, images, and video all in one place instead of having to add and format them individually. Just double-click and easily create content.
A rich text element can be used with static or dynamic content. For static content, just drop it into any page and begin editing. For dynamic content, add a rich text field to any collection and then connect a rich text element to that field in the settings panel. Voila!
Headings, paragraphs, blockquotes, figures, images, and figure captions can all be styled after a class is added to the rich text element using the "When inside of" nested selector system.


Stated accuracy of Td is ±3C for Td from -40 to 80C.
The following charts illustrate the maximum error of Td with respect to Ta and RH.
View PDF of Accuracy Statement here.


The innovative PosiPatch uses a magnetic ring to hold it against the surface, so no adhesive is required. This means that the PosiPatch isn’t destroyed when removed from the surface, unlike conventional patches. After rinsing with deionized water, the PosiPatch can be used again.
The PosiPatch can be reused multiple times until water begins to leak through the air-permeable membrane or the seal against the substrate.
In our tests on freshly blasted steel with a typical 50-100 micron (2-4 mil) profile, PosiPatches were reused dozens of times with no noticeable wear or leakage. Patch life will vary depending on use- if dragged along the substrate, lifespan will be reduced.
We believe that 10 uses is a very conservative estimate of lifespan and still yields the lowest per-test cost of any commercially available Bresle Method Patch. The below tables compare the per-test costs of various options, using competitive prices found online.
If performing 10 tests, and reusing the PosiPatch:


Replica Tape provides a simple way to obtain an impression of a surface for analysis. It consists of a layer of crushable plastic micro foam affixed to a 50.8 μm (2 mil) incompressible polyester film.
When compressed against a roughened surface, the foam collapses and acquires an impression, or reverse replica, of the surface. It is available in a number of grades to accommodate measurements in different profile ranges.

Placing the compressed tape (replica) into the PosiTector RTR gives a measure of the average maximum peak-to-valley height of the surface roughness profile.

Annotate images using drawing tools—ideal for identifying a specific location or area within an image


Unequal pulling force during testing caused by uneven adhesive bond lines and coating surfaces can result in random, unexplainable readings. To obtain more repeatable and meaningful adhesion measurements, it is imperative that the pulling force applied to the test dolly is uniformly distributed over the surface being tested.
Both the PosiTest AT-M manual and PosiTest AT-A automatic models compensate for misalignment. The self-aligning, quick-coupling actuator and spherical articulating dolly head enable uniform distribution of the pulling force over the surface being tested, preventing a one-sided pull-off.


Two grades of Testex™ Press-O-Film™ replica tape, “Coarse” and "X-Coarse", are available to span the primary range of surface profiles for the coatings and linings industry –– 20 to 115 µm / 0.8 to 4.5 mils.
An unfortunate characteristic of replica tape is that conventional spring micrometer measurements are most accurate near the middle of each grade's range and least accurate at the outer ends of each grade's range. That is why two other grades, Coarse Minus (< 20 µm / 0.8 mils) and X-Coarse Plus (> 115 µm / 4.5 mils), are used to check and, if necessary, adjust measurements at the upper and lower ends of the primary range.
Inside the primary range, Coarse and X-Coarse tape share a 38 - 64 μm (1.5 - 2.5 mils) "overlap" region. Measurements with conventional micrometers require a complicated and time consuming procedure of averaging one reading using Coarse grade and one reading using X-Coarse grade to achieve reasonable accuracy.
With a single measurement, the PosiTector RTR produces a more accurate peak-to-valley height measurement HL from Coarse or X-Coarse tapes that has been adjusted for their non-linearity. There is no need to average two or more replicas from different grades of tape AND there is no need to subtract the 50.8 μm / 2 mils of incompressible polyester film. The advantages are a reduction in measurement uncertainty, inspector workload, likelihood of error, and the number of replicas needed by inspectors to assure accuracy.
The PosiTector RTR can also display a height value (H) that is comparable to what conventional analog spring micrometers would display after the 50.8 μm / 2 mils of incompressible polyester film has been subtracted.


Magnetic pull-off gages use a permanent magnet, a calibrated spring, and a graduated scale. The attraction between the magnet and magnetic steel pulls the two together. As the coating thickness separating the two increases, it becomes easier to pull the magnet away. Coating thickness is determined by measuring this pull-off force. Thinner coatings will have stronger magnetic attraction while thicker films will have comparatively less magnetic attraction. Testing with magnetic gages is sensitive to surface roughness, curvature, substrate thickness, and the make up of the metal alloy.
Magnetic pull-off gages are rugged, simple, inexpensive, portable, and usually do not require any calibration adjustment. They are a good, low-cost alternative in situations where quality goals require only a few readings during production.
Pull-off gages are typically pencil-type or rollback dial models. Pencil-type models (PosiPen shown in Fig 1) use a magnet that is mounted to a helical spring that works perpendicularly to the coated surface. Most pencil-type pull-off gages have large magnets and are designed to work in only one or two positions, which partially compensate for gravity. A more accurate version is available, which has a tiny, precise magnet to measure on small, hot, or hard-to-reach surfaces. A triple indicator ensures accurate measurements when the gage is pointed down, up, or horizontally with a tolerance of ±10%.

Rollback dial models (PosiTest shown in Fig 2) are the most common form of magnetic pull-off gage. A magnet is attached to one end of a pivoting balanced arm and connected to a calibrated hairspring. By rotating the dial with a finger, the spring increases the force on the magnet and pulls it from the surface. These gages are easy to use and have a balanced arm that allows them to work in any position, independent of gravity. They are safe in explosive environments and are commonly used by painting contractors and small powder coating operations. Typical tolerance is ±5%.

Eddy current techniques are used to nondestructively measure the thickness of nonconductive coatings on nonferrous metal substrates. A coil of fine wire conducting a high-frequency alternating current (above 1 MHz) is used to set up an alternating magnetic field at the surface of the instrument's probe. When the probe is brought near a conductive surface, the alternating magnetic field will set up eddy currents on the surface. The substrate characteristics and the distance of the probe from the substrate (the coating thickness) affect the magnitude of the eddy currents. The eddy currents create their own opposing electromagnetic field that can be sensed by the exciting coil or by a second, adjacent coil.
Magnetic film gages are used to non-destructively measure the thickness of a nonmagnetic coating on ferrous substrates. Most coatings on steel and iron are measured this way. Magnetic gages use one of two principles of operation: magnetic pull-off or magnetic/electromagnetic induction.
Magnetic pull-off gages use a permanent magnet, a calibrated spring, and a graduated scale. The attraction between the magnet and magnetic steel pulls the two together. As the coating thickness separating the two increases, it becomes easier to pull the magnet away. Coating thickness is determined by measuring this pull-off force. Thinner coatings will have stronger magnetic attraction while thicker films will have comparatively less magnetic attraction. Testing with magnetic gages is sensitive to surface roughness, curvature, substrate thickness, and the make up of the metal alloy.
Magnetic induction instruments use a permanent magnet as the source of the magnetic field. A Hall-effect generator or magneto-resistor is used to sense the magnetic flux density at a pole of the magnet. Electromagnetic induction instruments use an alternating magnetic field. A soft, ferromagnetic rod wound with a coil of fine wire is used to produce a magnetic field. A second coil of wire is used to detect changes in magnetic flux.
These electronic instruments measure the change in magnetic flux density at the surface of a magnetic probe as it nears a steel surface. The magnitude of the flux density at the probe surface is directly related to the distance from the steel substrate. By measuring flux density the coating thickness can be determined.


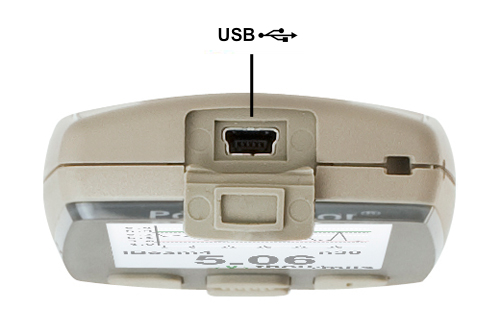
PosiTector users can capture and save an image copy of the current gage display by simultaneously pressing both the (-) and (+) buttons. The last 10 screen captures are stored in memory and can be accessed within the PosiSoft USB Drive.


Statistics mode continually displays/updates average, standard deviation, min/max thickness and number of readings while measuring.


Display Languages: English, French, German, Spanish, Chinese, Japanese, Portuguese, Italian, Norwegian, Russian, Czech, Polish and Korean.


All PosiTector 6000 regular separate probes are suitable for underwater measurement and are available with extended cable lengths up to 250 feet / 75 meters.
Ideal for measuring coating thickness on underwater pipes, ships, bulkheads, offshore oil rigs or anywhere extended reach is required.
Maximum cable lengths vary depending on probe type...
Extended cable lengths are also available for ferrous micro probes (F0S, F45S, F90S) and FKS probes (thick coatings) – up to 50 ft (15 m).
Note: Micro probes and FKS probes do not support underwater usage
Contact us for additional information including lead time.


All gages come complete with body and probe, couplant, protective rubber holster with belt clip, wrist strap, 3 AAA alkaline batteries, instructions, nylon carrying case with shoulder strap, protective lens shield, Long Form Certificate of Calibration traceable to NIST, USB cable, PosiSoft Software, two (2) year warranty.



Powerful desktop software for downloading, viewing, printing and storing measurement data. No internet connection required.
The intuitive and familiar user interface of PosiSoft Desktop brought to your web browser. Data is securely stored in the cloud.
Learn MoreAn easy-to-use mobile app (iOS/ Android) that connects to your PosiTector Advanced, PosiTector Smartlink, or PosiTest AT.
Learn MoreA simple gage interface to retrieve data in a manner similar to a flash drive. No software to install or internet connection required.
Learn More
No. Our instruments are designed for simple operation, feature easy-to-use menus, both full and quick instruction manuals, and helpful videos. In lieu of demonstration models, we provide unlimited technical support via telephone and/or email, and a limited 30-day money back guarantee.
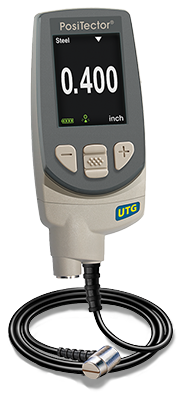
The PosiTector UTG arrives fully calibrated and ready to measure. A Long-Form Certificate of Calibration traceable to NIST is included, which documents actual readings taken by your instrument at our calibration laboratory on standards traceable to a national metrology institute. Beware of ‘Certificates’ or ‘Certificates of Conformance’ offered by competitors. These typically do not include actual instrument readings, and are often insufficient to meet common quality requirements.
Verification of gage calibration and accuracy can be performed with the accessory Certified Step Block. If necessary, the PosiTector UTG operator can easily perform a calibration adjustment to align the gage’s thickness readings to match that of a known reference sample.
Yes! The PosiTector UTG features several preprogrammed sound velocities for common materials. For best accuracy, make a simple adjustment to a known sample thickness of the material or quickly enter the material’s sound velocity into the gage. The PosiTector UTG C can be adjusted to a broad range of sound velocities spanning from 0.0492 to 0.393 mils/µs (1250 to 10000 m/s).
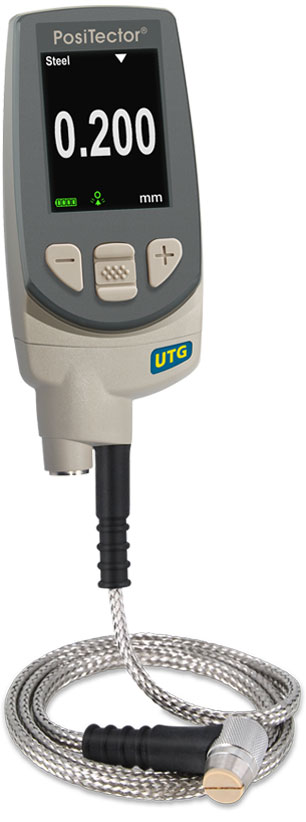
Our PosiTector UTG ultrasonic wall thickness instruments are designed to accurately measure the wall thickness of carbon steel, aluminum, stainless steel and plastic.
PosiTector UTG probes utilize a 5MHz transducer. Like other UT (ultrasonic wall thickness) gages utilizing a 5MHz transducer, the PosiTector UTG is challenged to provide reliable wall thickness measurements on cast metals including iron, aluminum and zinc. The internal structure of the cast metal typically interferes with the transmission of a 5MHz sound impulse causing the gage to yield inaccurate thickness readings.
The PosiTector UTG C (Corrosion) single echo probe uses a dual-element transducer, a focused “V-path”, and V-path compensation to accurately measure the thickness of metals with particularly heavy corrosion or pitting. The UTG C single echo probe will not ignore the thickness of the exterior coating: for best measurement accuracy, it may be necessary to remove any coating present at the point of measurement.
The PosiTector UTG M (Multi-echo) probe uses a single element transducer to accurately measure the metal thickness of a new or lightly corroded structure while ignoring the thickness of protective coatings. The ultrasonic beam travels in a straight path to the material’s back wall at 90° relative to the surface. When three consecutive back wall echoes are detected, the probe makes a time-based calculation to eliminate the coating thickness from the gage reading.
Yes, but coatings such as paint have a slower sound velocity than metal. This means that coating ‘appears’ much thicker to the instrument than it actually is, and can substantially affect the reading. Using Thru-Paint technology, the PosiTector UTG M multi-echo probe disregards the exterior coating thickness on a painted metal structure and reports only the metal thickness.
The PosiTector UTG C (Corrosion) is a proven solution for measuring the thickness of metal structures with pitting and/or moderate-to-severe corrosion on the back wall.
PosiTector probes include a Certificate of Calibration with no expiry or end date. They have no shelf life, therefore the length of time in the field is not a good indicator for recalibration intervals. Many organizations with quality programs and recertification programs require annual recalibrations, and this is a good starting point for most users. DeFelsko recommends that customers establish calibration intervals based upon their own experience and work environment. Based on our product knowledge, data and customer feedback, a one year calibration interval from the date the instrument was placed in service is a good starting point.
PosiTector bodies accept all PosiTector probes easily converting from a coating thickness gage to a surface profile gage, dew point meter, soluble salt tester, hardness and ultrasonic thickness gage.
Ideal for checking calibration and operation of ultrasonic thickness gages and are an important component in fulfilling both ISO and in-house quality control requirements.
Heavy-duty, waterproof Pelican cases complete with a custom foam insert to securely hold your PosiTector instrument.
Every PosiTector 200 and PosiTector UTG ships with (1) bottle of Ultrasonic couplant. Additional 4oz. bottles are available (sold in cases of 12). MSDS
Battery-operated and light weight, this Bluetooth Printer prints readings and statistical summaries via Bluetooth from Advanced models.
Convenient hard shell case for carrying a PosiTector gage body and multiple probes
Precharged batteries ready to use with a considerably longer run time than conventional Nickel Cadmium batteries. High performance in low temperatures and no charger required.
Pack of 5 thin plastic lens shields to protect PosiTector display from paint overspray. One lens shield included in every PosiTector purchase.
Use for continuous operation or battery charging. This kit supplies several alternate power solutions for your battery-operated PosiTector. Operate your gage without the need for batteries.
The rich text element allows you to create and format headings, paragraphs, blockquotes, images, and video all in one place instead of having to add and format them individually. Just double-click and easily create content.
A rich text element can be used with static or dynamic content. For static content, just drop it into any page and begin editing. For dynamic content, add a rich text field to any collection and then connect a rich text element to that field in the settings panel. Voila!
Headings, paragraphs, blockquotes, figures, images, and figure captions can all be styled after a class is added to the rich text element using the "When inside of" nested selector system.


Stated accuracy of Td is ±3C for Td from -40 to 80C.
The following charts illustrate the maximum error of Td with respect to Ta and RH.
View PDF of Accuracy Statement here.


The innovative PosiPatch uses a magnetic ring to hold it against the surface, so no adhesive is required. This means that the PosiPatch isn’t destroyed when removed from the surface, unlike conventional patches. After rinsing with deionized water, the PosiPatch can be used again.
The PosiPatch can be reused multiple times until water begins to leak through the air-permeable membrane or the seal against the substrate.
In our tests on freshly blasted steel with a typical 50-100 micron (2-4 mil) profile, PosiPatches were reused dozens of times with no noticeable wear or leakage. Patch life will vary depending on use- if dragged along the substrate, lifespan will be reduced.
We believe that 10 uses is a very conservative estimate of lifespan and still yields the lowest per-test cost of any commercially available Bresle Method Patch. The below tables compare the per-test costs of various options, using competitive prices found online.
If performing 10 tests, and reusing the PosiPatch:


Replica Tape provides a simple way to obtain an impression of a surface for analysis. It consists of a layer of crushable plastic micro foam affixed to a 50.8 μm (2 mil) incompressible polyester film.
When compressed against a roughened surface, the foam collapses and acquires an impression, or reverse replica, of the surface. It is available in a number of grades to accommodate measurements in different profile ranges.

Placing the compressed tape (replica) into the PosiTector RTR gives a measure of the average maximum peak-to-valley height of the surface roughness profile.

Annotate images using drawing tools—ideal for identifying a specific location or area within an image


Unequal pulling force during testing caused by uneven adhesive bond lines and coating surfaces can result in random, unexplainable readings. To obtain more repeatable and meaningful adhesion measurements, it is imperative that the pulling force applied to the test dolly is uniformly distributed over the surface being tested.
Both the PosiTest AT-M manual and PosiTest AT-A automatic models compensate for misalignment. The self-aligning, quick-coupling actuator and spherical articulating dolly head enable uniform distribution of the pulling force over the surface being tested, preventing a one-sided pull-off.


Two grades of Testex™ Press-O-Film™ replica tape, “Coarse” and "X-Coarse", are available to span the primary range of surface profiles for the coatings and linings industry –– 20 to 115 µm / 0.8 to 4.5 mils.
An unfortunate characteristic of replica tape is that conventional spring micrometer measurements are most accurate near the middle of each grade's range and least accurate at the outer ends of each grade's range. That is why two other grades, Coarse Minus (< 20 µm / 0.8 mils) and X-Coarse Plus (> 115 µm / 4.5 mils), are used to check and, if necessary, adjust measurements at the upper and lower ends of the primary range.
Inside the primary range, Coarse and X-Coarse tape share a 38 - 64 μm (1.5 - 2.5 mils) "overlap" region. Measurements with conventional micrometers require a complicated and time consuming procedure of averaging one reading using Coarse grade and one reading using X-Coarse grade to achieve reasonable accuracy.
With a single measurement, the PosiTector RTR produces a more accurate peak-to-valley height measurement HL from Coarse or X-Coarse tapes that has been adjusted for their non-linearity. There is no need to average two or more replicas from different grades of tape AND there is no need to subtract the 50.8 μm / 2 mils of incompressible polyester film. The advantages are a reduction in measurement uncertainty, inspector workload, likelihood of error, and the number of replicas needed by inspectors to assure accuracy.
The PosiTector RTR can also display a height value (H) that is comparable to what conventional analog spring micrometers would display after the 50.8 μm / 2 mils of incompressible polyester film has been subtracted.


Magnetic pull-off gages use a permanent magnet, a calibrated spring, and a graduated scale. The attraction between the magnet and magnetic steel pulls the two together. As the coating thickness separating the two increases, it becomes easier to pull the magnet away. Coating thickness is determined by measuring this pull-off force. Thinner coatings will have stronger magnetic attraction while thicker films will have comparatively less magnetic attraction. Testing with magnetic gages is sensitive to surface roughness, curvature, substrate thickness, and the make up of the metal alloy.
Magnetic pull-off gages are rugged, simple, inexpensive, portable, and usually do not require any calibration adjustment. They are a good, low-cost alternative in situations where quality goals require only a few readings during production.
Pull-off gages are typically pencil-type or rollback dial models. Pencil-type models (PosiPen shown in Fig 1) use a magnet that is mounted to a helical spring that works perpendicularly to the coated surface. Most pencil-type pull-off gages have large magnets and are designed to work in only one or two positions, which partially compensate for gravity. A more accurate version is available, which has a tiny, precise magnet to measure on small, hot, or hard-to-reach surfaces. A triple indicator ensures accurate measurements when the gage is pointed down, up, or horizontally with a tolerance of ±10%.

Rollback dial models (PosiTest shown in Fig 2) are the most common form of magnetic pull-off gage. A magnet is attached to one end of a pivoting balanced arm and connected to a calibrated hairspring. By rotating the dial with a finger, the spring increases the force on the magnet and pulls it from the surface. These gages are easy to use and have a balanced arm that allows them to work in any position, independent of gravity. They are safe in explosive environments and are commonly used by painting contractors and small powder coating operations. Typical tolerance is ±5%.

Eddy current techniques are used to nondestructively measure the thickness of nonconductive coatings on nonferrous metal substrates. A coil of fine wire conducting a high-frequency alternating current (above 1 MHz) is used to set up an alternating magnetic field at the surface of the instrument's probe. When the probe is brought near a conductive surface, the alternating magnetic field will set up eddy currents on the surface. The substrate characteristics and the distance of the probe from the substrate (the coating thickness) affect the magnitude of the eddy currents. The eddy currents create their own opposing electromagnetic field that can be sensed by the exciting coil or by a second, adjacent coil.
Magnetic film gages are used to non-destructively measure the thickness of a nonmagnetic coating on ferrous substrates. Most coatings on steel and iron are measured this way. Magnetic gages use one of two principles of operation: magnetic pull-off or magnetic/electromagnetic induction.
Magnetic pull-off gages use a permanent magnet, a calibrated spring, and a graduated scale. The attraction between the magnet and magnetic steel pulls the two together. As the coating thickness separating the two increases, it becomes easier to pull the magnet away. Coating thickness is determined by measuring this pull-off force. Thinner coatings will have stronger magnetic attraction while thicker films will have comparatively less magnetic attraction. Testing with magnetic gages is sensitive to surface roughness, curvature, substrate thickness, and the make up of the metal alloy.
Magnetic induction instruments use a permanent magnet as the source of the magnetic field. A Hall-effect generator or magneto-resistor is used to sense the magnetic flux density at a pole of the magnet. Electromagnetic induction instruments use an alternating magnetic field. A soft, ferromagnetic rod wound with a coil of fine wire is used to produce a magnetic field. A second coil of wire is used to detect changes in magnetic flux.
These electronic instruments measure the change in magnetic flux density at the surface of a magnetic probe as it nears a steel surface. The magnitude of the flux density at the probe surface is directly related to the distance from the steel substrate. By measuring flux density the coating thickness can be determined.


PosiTector users can capture and save an image copy of the current gage display by simultaneously pressing both the (-) and (+) buttons. The last 10 screen captures are stored in memory and can be accessed within the PosiSoft USB Drive.


Statistics mode continually displays/updates average, standard deviation, min/max thickness and number of readings while measuring.


Display Languages: English, French, German, Spanish, Chinese, Japanese, Portuguese, Italian, Norwegian, Russian, Czech, Polish and Korean.


All PosiTector 6000 regular separate probes are suitable for underwater measurement and are available with extended cable lengths up to 250 feet / 75 meters.
Ideal for measuring coating thickness on underwater pipes, ships, bulkheads, offshore oil rigs or anywhere extended reach is required.
Maximum cable lengths vary depending on probe type...
Extended cable lengths are also available for ferrous micro probes (F0S, F45S, F90S) and FKS probes (thick coatings) – up to 50 ft (15 m).
Note: Micro probes and FKS probes do not support underwater usage
Contact us for additional information including lead time.